The CEL (check engine light) was coming on in my car but the strange thing was that it was very sporadic and somtimes would be on for the whole time I was driving or sometimes it would last for 2 seconds. Other times a hard shift or a bump would cause it to light. So when I went to my local mechanic to get the AC recharged, I told them to look at it. They scanned it and charged $90 to tell me that a sensor was malfunctioning and if the engine ran fine, then it probally was fine. They wanted another $125 to do futhur diagnostic work. I said no. Even though the car ran fine, I still wanted to get rid of the light.
I had a couple of options. I could buy a Vag-Com (see links). This would allow all the functions that VW has to diagnose the car. However, these cost upwards of $250 dollars and I couldn''t justify that cost to repair the car, although I still want one. I could also take the car to a dealer or have the mechanic look in to it. Both would be at least $150. Still, I wanted to do it cheaper. So I decided to borrow a OBDII scanner. I plugged it in and nothing. It just gave me an error code. Upon further research, I found that my early 1995 car was OBDI even though it haves an OBDII port. So I searched around and on Ebay, I found this:
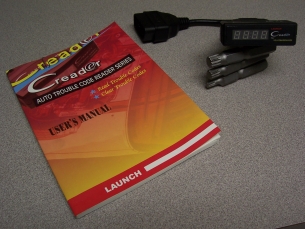
It cost around $50 shipped and it pulls the codes from the engine, ABS system, air bag system, and auto transmission if you have one and it works very well and even though it looks cheep and Chinese it is suprisingly pretty good quality. I plugged it in and it gave me a code 0203. This displays in hexadecimal and if you convert it to decimal using Windows calculator that is 0515, which is the standard code that would come from a VAG-COM (I think). So the book says this is a Hall Sender G40. I looked around at VW Vortex and found that cars with a distrubutor had a hall sender to determine the position of the rotor. Well, my car had electronic ignition so this didn''t apply. So I searched some more and found that the hall sender on later cars referred to the cam position sensor (CPS). This detects the position of the cam using a magnet and then adjusts the timing based on this. If the sensor is not working, then the default timing tables stored in the ECU will be used and there will be no sequential fuel injection. This would explain why the engine was sometimes hesitant while accelerating when the light was on. I located the CPS in the shop manual (Bentley) and determined that it was an easy fix. I ordered a new one from German Auto Parts (see link) for around $50. Here is the procedure to replace it.
- Determine that it is indeed the CPS which is bad.
- Check the voltage going to the CPS using a volt meter. It should be around 12. If there is no voltage then the ECU is probally bad.
- Open the hood and unplug all the spark plug wires from the coil pack. This is the thing that all the spark plug wires plug into on the right side of the engine. Move them out of the way. You do not need to remove them from the spark plugs though.
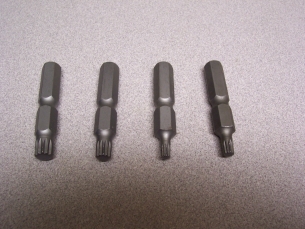
- You will need an 8mm 12 point (triple square point) socket drive bit. I bought a cheap set at Autozone for around $12. These are cheap and will not last if you plan on using them on a head bolt but they will work for this. You could also use a allen wrench but there is a great chance that you will stirp them like I did and have to go to the dealer and buy new ones like me. Here is a picture of the bits:
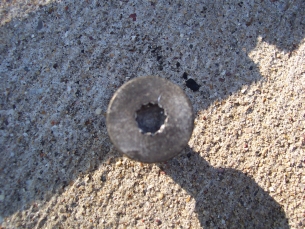
Here is a picture of the partially stripped nut. The other nut was completly stripped and I had to pound a larger allen key into it with a hammer and then turn it to get it out.
- Locate the 4 nuts/bolts that hold the black plastic piece on the engine that the ignition wires snap into. 2 are bolts, 2 are nuts. One is positioned horizontally with the head pointing to the back of the engine. Remove them and the plastic covers. Click on this picture to see the locations of the bolts. (Note arrows)
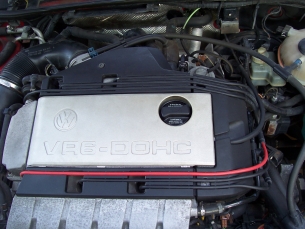
- Unclip the wire from the coil pack and remove the 4 allen bolts holding it on. Remove it.
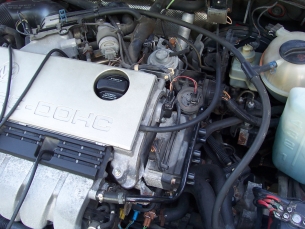
- Now the CPS is able to be removed. It is held in by one bolt. It is the thing in the center of the picture:
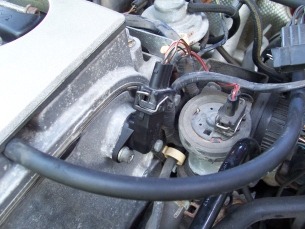
- With a little force, it can be removed. Here is what mine looked like:
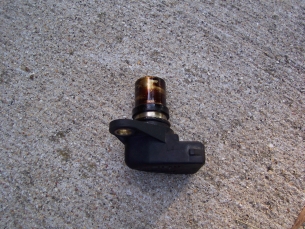
- This is what the new one looked like before installation:
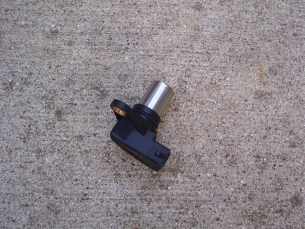
- Install the new CPS and torque the bolt holding it in to 10Nm (7ft lb). Plug the wiring harness back in to the sensor.
- Before installing the coil pack, check it for cracks. These things do crack and need to be replaced or the cracks have to be epoxyed. Install the coil. Torque the bolts to 10Nm (7ft lb). Plug back in the coil.
- Take the plastic wire holders and put in the back bolt that attaches the two covers loosly together BEFORE putting them on the engine. Otherwise I have found that it is very difficult to put this bolt in.
- Reinstall the wire guides on the engine and torque the bolts and nuts to 5Nm (44in lb). Do not over torque these or they will strip! The drive bit fits in a 1/2" socket which goes on the torque wrench:
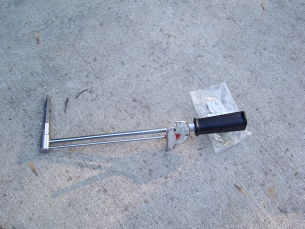
- Put the ignition wires back in their respective guides and match the cylinder number up with the number on the coil pack and plug them back into the coil pack.
- Let the code reader display the codes 3 times so that they will be cleared from the ECU, start the car and the light should go away and in my case, it did. If this doesn't fix the problem, it could be the rotor on the cam and this would require the removal of the valve cover to inspect it.
Download a zip file containing a PDF version of this guide and detail images


