Alarm modules with keyless entry from late MkIII Jettas (97-98) can be swapped into B3 and B4 Passats to add factory keyless entry functionality. To do this, you need the alarm module and a key FOB (remote). The modules can be found in junkyards or ebay, where I got mine.
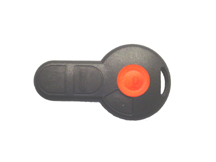
The part number is 1HM 937 045 Q or 1HM 937 045 M. I suppose you could order one from the dealer or at www.worldimpex.com but it would probably cost several hundred dollars. As far as the key FOB, you can buy one at the dealer or here for around $35. I also saw some on ebay but most of them were over $35 or really worn. The part number of this remote is 1EM 937 047A. It is made by Clarion and the FCC ID must be M3GHU01WT. Sometimes, it is referred to as a ''banjo'' style remote. The ones made by Hella do not work. Here is a picture of the remote that works:

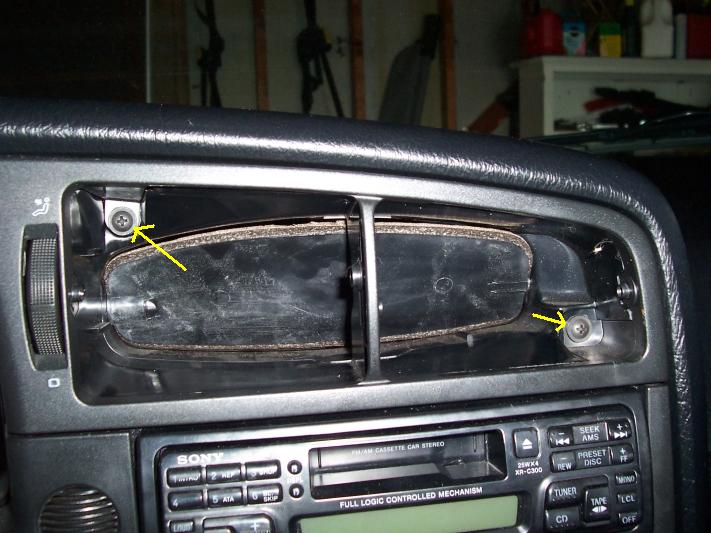
The remote has a panic, lock, unlock, and trunk release buttons. They all work without any work except for the trunk release which requires an extra relay. The trunk release only works on the sedan and will not work on the wagons because they don''t have a trunk release. You need a SPDT automotive style relay. Parts Express sells one here. I didn''t want to pay for the shipping so I went to Advance Auto Parts and looked through the relay catalogue until I found the right one. It was a MR78. You could probably go there and ask them for that part and they would give you the right one. If you order one from Parts Express, I suggest getting a socket but if you get one somewhere else, 1/4" quick disconnect crimp connectors can be used. If you want to hook up the trunk release, you will need about 10'' of cable that has at least 3 conductors. I used some 4 conductor alarm wire. Also, various crimp on connectors. Start by disconnecting the negitive terminal of the battery. I destroyed a module by connecting it to the car while the battery was connected so make sure you do this first. You have to gain access to the alarm module. To do this, you have to start by pulling out the headlight switch. Pull carefully on the right side of the switch and it should pop out. Then remove the vent above the headlight switch and the two center vents. I used needle nose pliers and grabbed the center of the vent and they pulled right out. Then remove the exposed screws. Click on the following images to see arrows.
And the center vents:
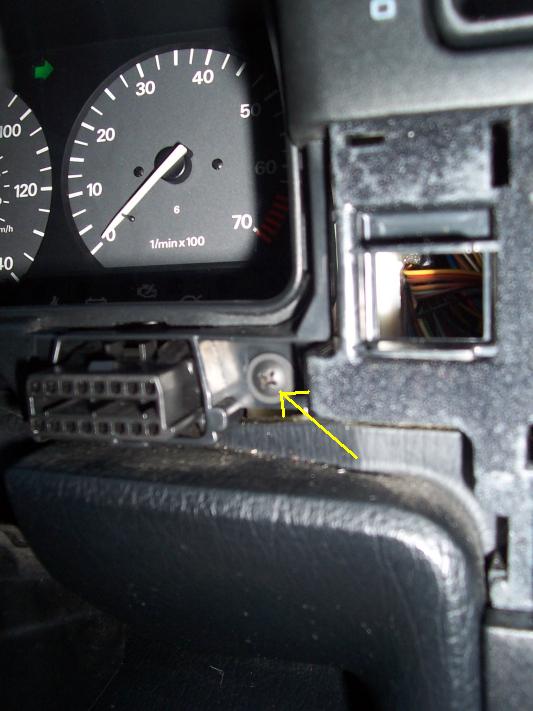
On the right side of the steering wheel there is a small plastic cover which covers the diagnostic port. It is to the left of the radio and has a small round vent and a engine symbol on in. Pull this off. Use a small screwdriver to unclip the diagnostic port. Then remove the screw.
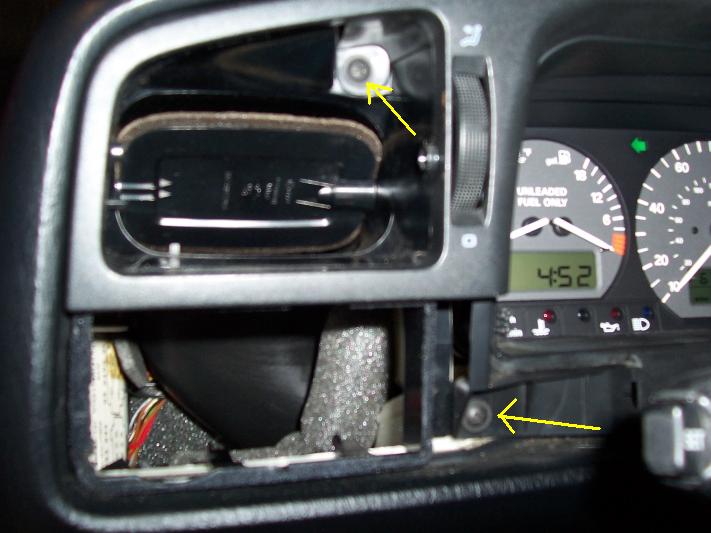
Now carefully pull of the trim that goes around the gauge cluster and vents. It will unclip and come off completly. Now, the vent housing above the headlight switch has to be removed. Remove the screw indicated in the picture below. The red arrow points to the existing alarm module that needs to be replaced.
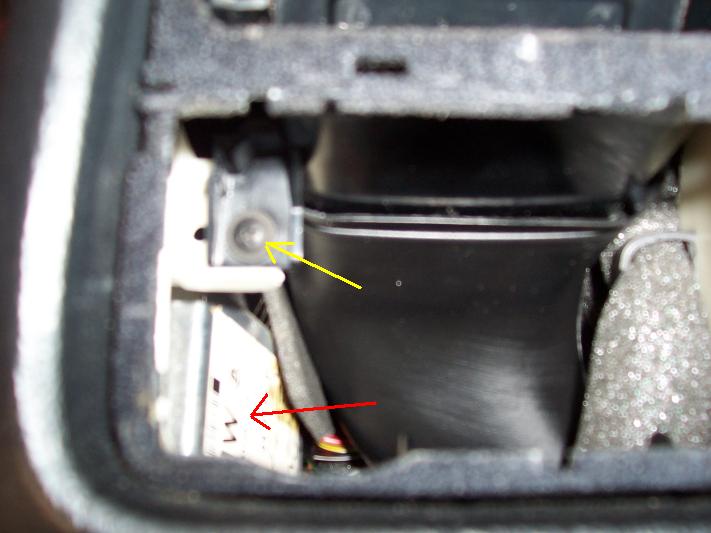
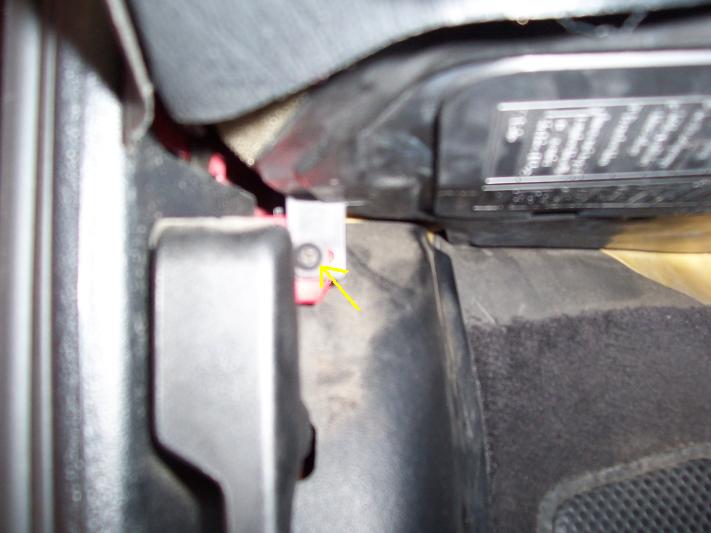
hen carefully remove the vent housing. Now you should be able to see the silver alarm module held in by two screws. To make it eaiser to remove the module, I removed the cover above the pedals by the fuse box. Remove the two screws holding it in. One is by the hood pop:
The other is towards the center of the panel:
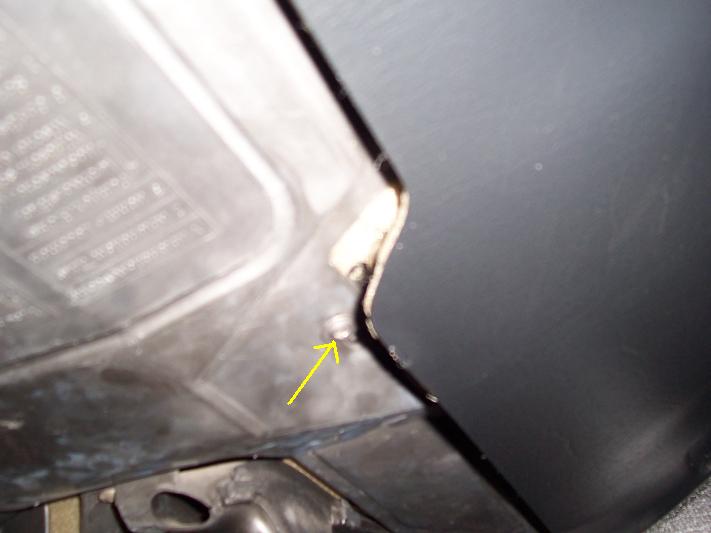
Then, the panel can be removed. Then I removed the screws from the alarm module and removed it. These screws were really hard to get out and took a lot of time because I didn''t have a short screwdriver but I did get them out. If you don''t want to hook up the trunk release, plug in the new module, fasten it to the top hole on the bracket, plug in the battery and procede to programming the remote. Otherwise, continue. The wiring that needs to be accessed for the trunk release is under the seat. Its not required but I think its eaiser if the seat is removed and its not that hard to do. Remove this little stopper thing from the front of the seat by the silde handle:
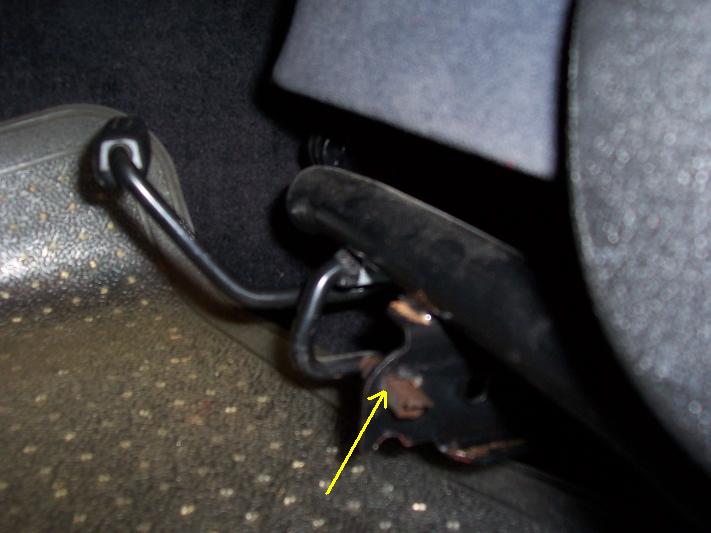
If you compress one side of it it can slide out. Then remove the two trim pieces at the back of the seat tracks:
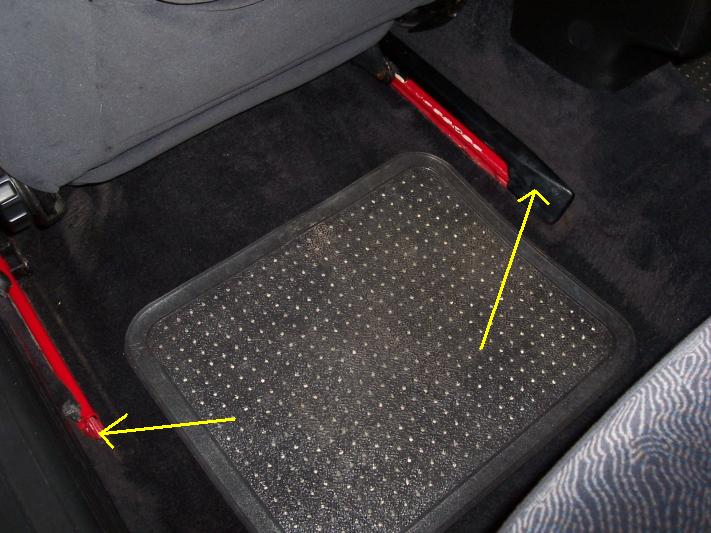
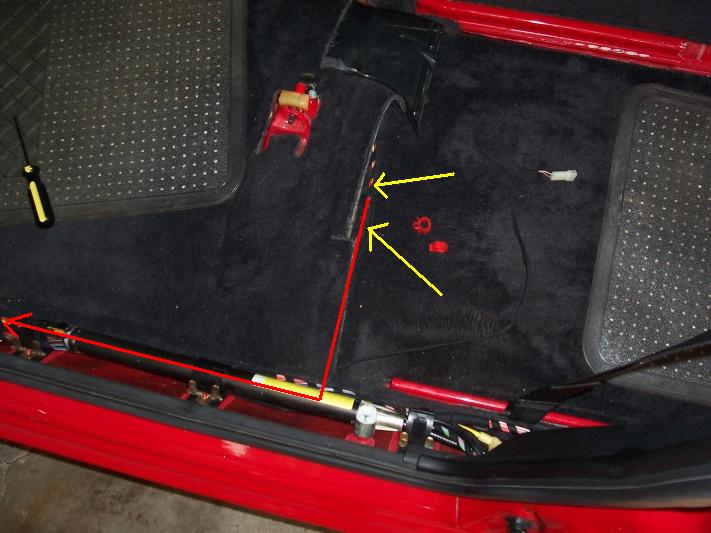
Then unhook the seatbelt sensor wire underneath the seats and they just slide out the back and can be removed. If you fold up the carpet seam, you can get to the trunk release wires: (yellow arrow: trunk release wires, red arrow: routing of three conductor cable)
At this point the door sill has to be removed. Push down on the top with the palm of your hand and pull the bottom edge out and up at the same time. Do this all along the entire sill and then remove it from the car. Unrap and remove some of the black rap around the wires under the seat. The bundle you want has a red wire, a red and white wire and two brown wires.

Before you put everything back together, make sure it works. Reconnect the battery and try locking the doors with the key. If everything is good, the horn should beep once and the doors should lock. Now put the vent housing back in making sure that it is securely snapped into the duct. Clip the trim piece back in and put the screws back. Put back the headlight switch, diagnostic port cover, and vents. Now on to programming the remote.
Now test all the functions of the remote and test the trunk button in the center console. They should all work.
If your car is late 95 and up and it has selective unlocking, which is when you turn the key only the drivers door unlocks and a second turn unlocks the rest of the car, you will need to run a jumper wire. See this post for details on doing this. I did not need to do this.
The original idea of the keyless entry upgrade can be found here.
A2B4Guy of VWVortex (Jeff) came up with the details of the trunk release in Passats. See this post.
Here is a good post about the keyless entry system. (Second Post)
Download a zip file containing a PDF version of this guide and detail images
Home | Admin | About | Disclaimer | Contact